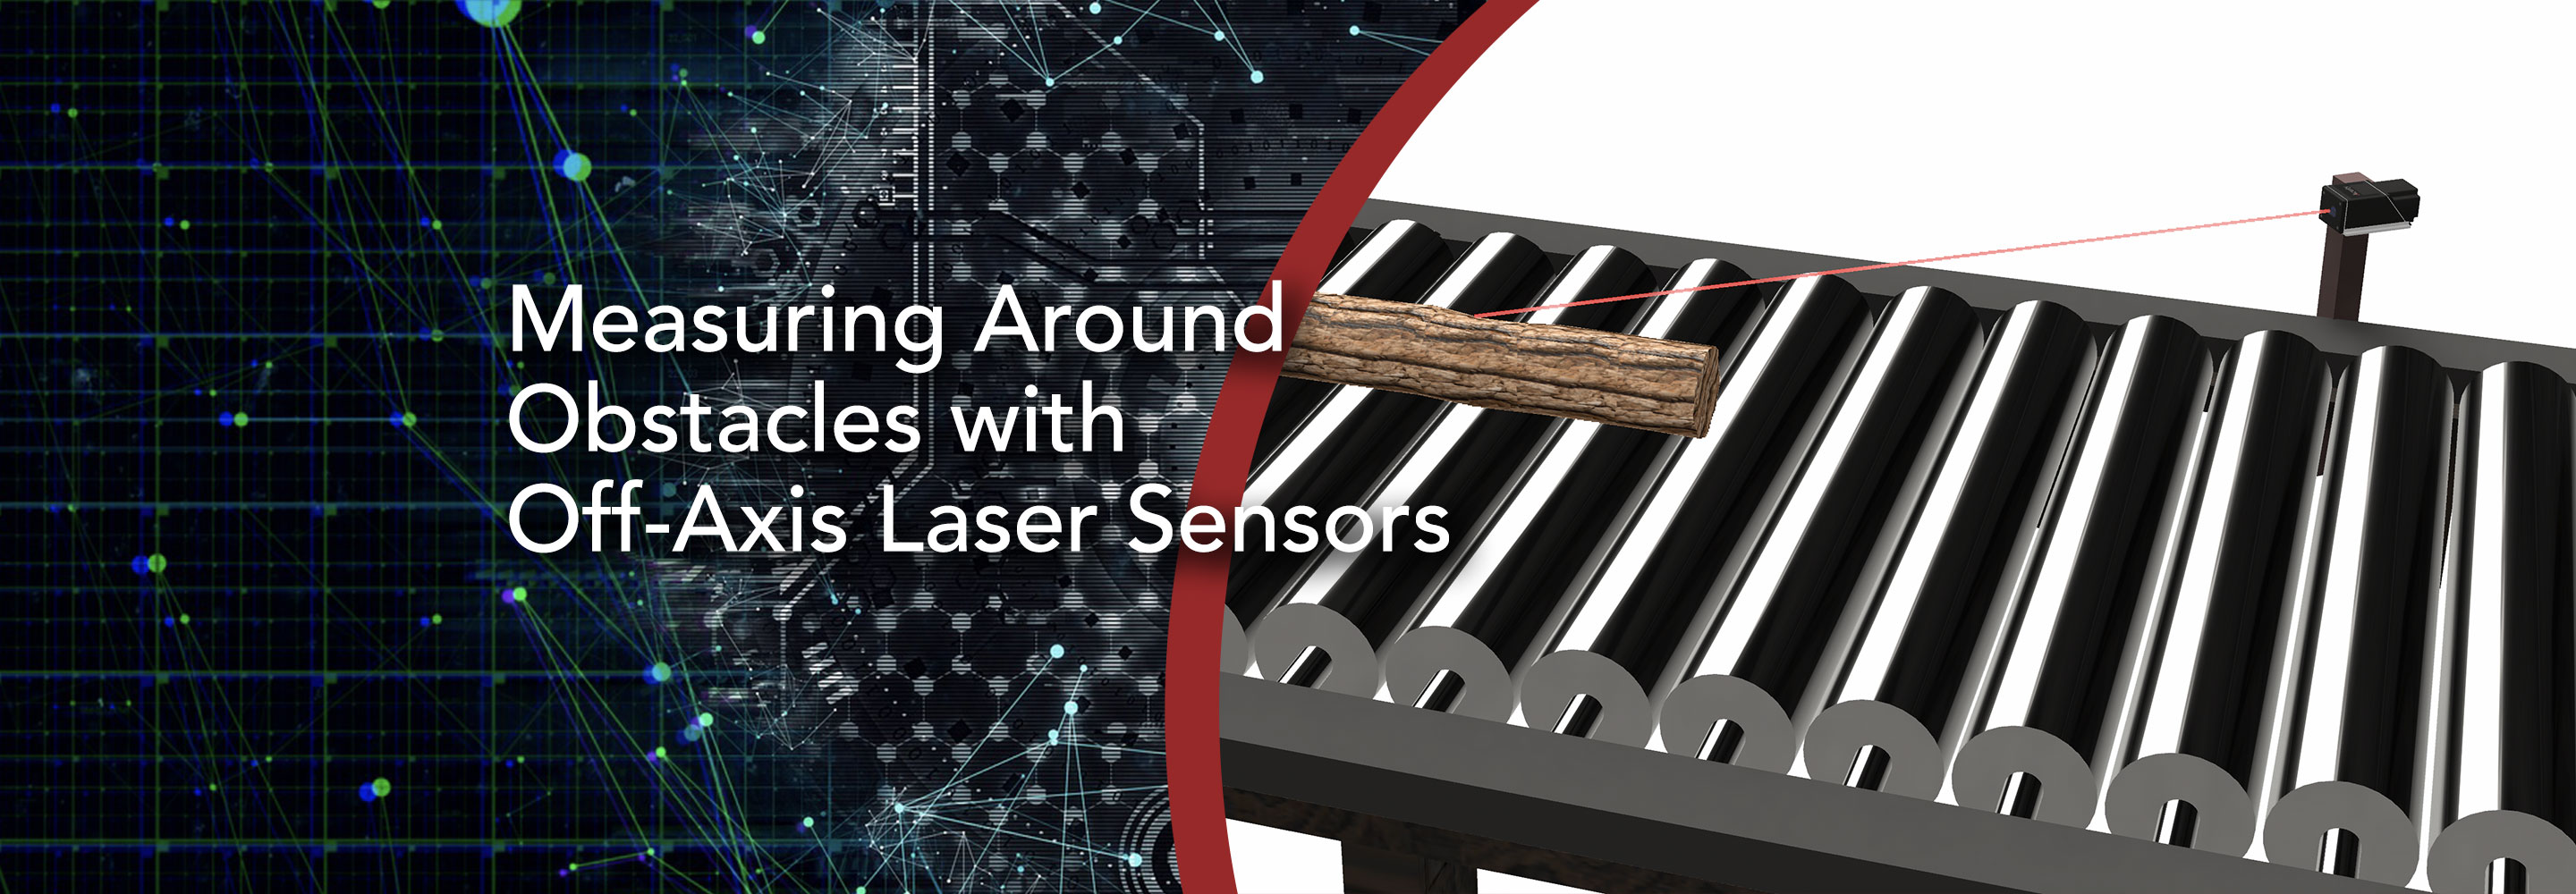
Measuring Around Obstacles with Off-Axis Laser Sensors
Acuity sensors are fantastic measurement tools, but let’s not beat around the bush: measuring with laser light has its frustrations. One of the biggest is that the sensor always needs a clear path to its target. If anything is in the way, the sensor will measure to the obstruction, and not to the desired target. This wouldn’t be so bad if the sensor didn’t have to be in line with the dimension you’re measuring. You can’t just set the sensor off to the side and measure the target at an angle…
Or can you?? Can you measure around the stupid bush that’s in the way?
It is possible to measure accurately at an angle by correcting for the cosine error! We’ll explain how in a moment, but first, some basics. One error that everyone using an Acuity laser sensor should account for and correct is the “cosine error.” This is the error that is caused by the angle between the laser light and the dimension you want to measure. We have an article about correcting this – What to Do When Your Sensor is Askew – and correcting the cosine error is super important for getting the most out of your sensor.
While most applications will be using this principle to correct for small angles, the principle is the same for larger angles. So yes: It is possible to measure accurately at an angle by correcting for the cosine error!
But there are some caveats. The most important of which is the movement of the measurement point.
Let’s say you want to measure logs this way. These are very simple logs. They have a nice flat cut on each side, but they do vary in length. You have a bush that’s blocking the optimal mounting location. You can’t cut down the bush, because it’s magic, and if you cut it down, you will be cursed to eat pineapple on pizza for the rest of your life. It’s just not worth it! Below is a diagram of this situation.
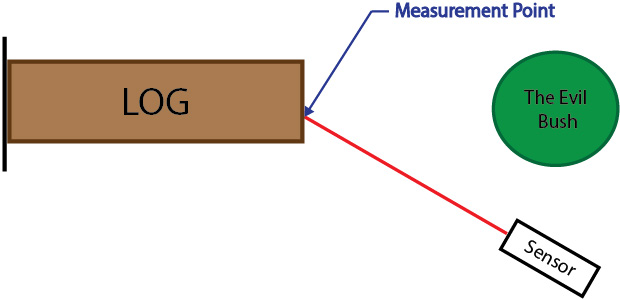
The point where the laser light hits the target is where the sensor will measure to. In this situation, the measurement point is on the flat end of the log, and you can correct for the cosine error to measure the length. No problem! But what if the log is longer?
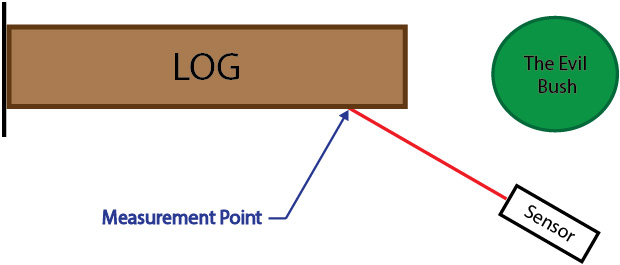
Now there is a problem. The sensor is hitting the side of the log, not the end. You will only measure the length where the laser hits, so you’re no longer measuring the length of the log.
Let’s see what happens when the log is too short.
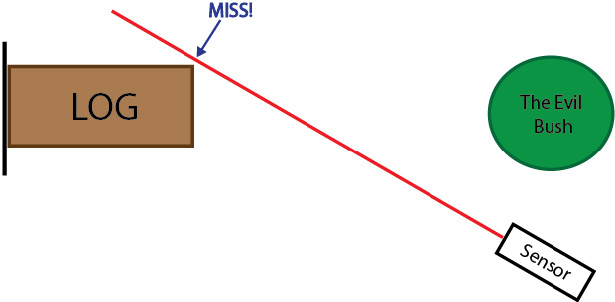
Whelp! Now we’ve missed the whole dang thing.
The important point is that the sensor must be able to make contact with the side you want to measure. Setting the sensor at an angle can cause it to miss the target in certain circumstances. The measurement point moves side to side for different target lengths and that can cause a problem when the sensor angle is great enough.
You may have picked up on another limitation of this setup. If the measurement point moves across the face of the target depending on its size, what if the target isn’t nice and flat?
To make it simple, let’s use the same setup, but the log has a significant notch in the end to help it connect to other logs. You just want the total length of the log.
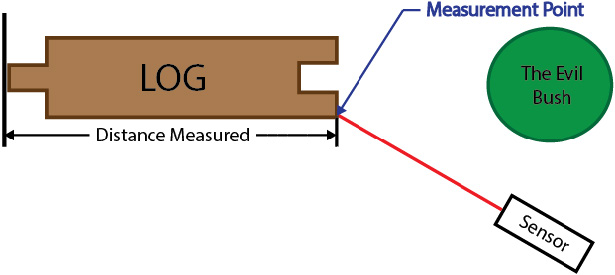
In this case, everything works out swell! The laser strikes the longest end of the log and you get the measurement you need. But if the log is a little shorter…
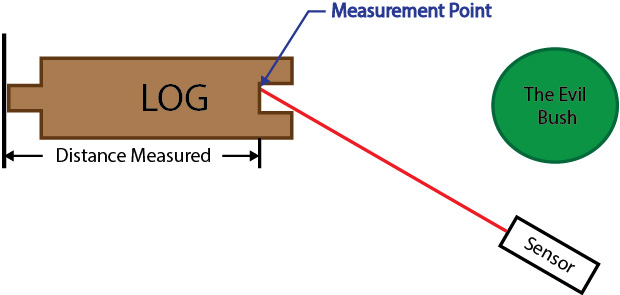
…the laser light falls into the notch. Again, that laser spot is where the sensor will measure. So if the spot is at the bottom of the notch, you will get length to the bottom of the notch, not the total log length.
This is an extreme example, but it applies to any application. If the target is not perfectly flat and perpendicular to the dimension you’re measuring, the measurement will change based on the location of the laser spot. If the sensor is at an angle, the laser spot will land at different positions on the target when the target is at different lengths. That is another source of error that will have to be evaluated.
How can you mitigate these issues?
So, we see that there are potential issues. How can you mitigate these issues?
To start, the larger the sensor angle, the more the location of the laser spot will move with different lengths. Keep the angle as small as possible to lessen this movement.
Take a look at the figure below. This is the same setup as the first example. The sensor is at a 30° angle. The log and the dotted lines show 3 different log lengths.
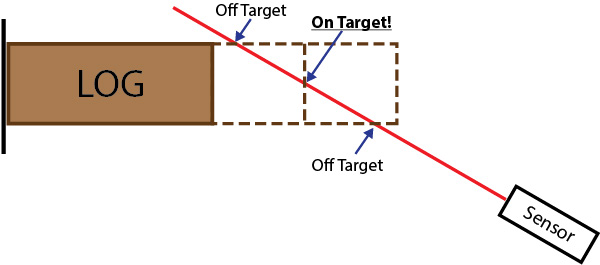
In this example, the laser beam only strikes the target surface of the middle log.
Now, let’s reduce the angle to 10°.
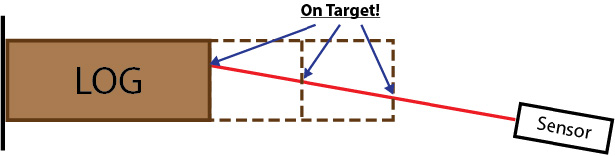
With a smaller angle, the sensor in this example can hit all 3 targets. It is always best to keep the angle as small as possible.
For targets with uneven surfaces, you may be able to fix the problem with a different target orientation.
Take the notched log example, you could rotate the log 90° so that the notch lines up with the path the laser spot takes as the length changes. Then you could mount the sensor to measure above or below the notch, and avoid the notch completely.
To illustrate my point, let’s take a look at the end of the notched log. The diagram below shows the log in the two orientations.
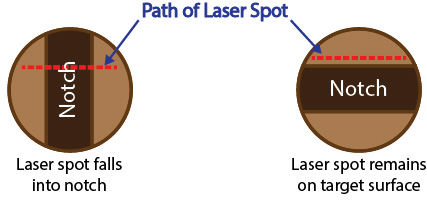
On the left, the log is positioned the same way it was in the original example. The notch (the dark brown area) is up and down. The red dotted line shows where the laser point would land with logs of various lengths. The ends of the line is where the spot would fall on the longest and shortest possible logs. In this case, the longest and shortest logs would be fine, but for many of the logs in the middle the laser point falls into the notch and you get an incorrect measurement.
On the right, the log is rotated 90° so that the notch is parallel to the line of possible laser spots. In this case, it doesn’t matter what the log’s length is, the laser spot never falls into the notch.
All that said, there are applications where an obstruction will be a dealbreaker. The disadvantages of a laser set at an angle may be unresolvable. But before you write off the possibility, why not contact our expert sales team by emailing or calling 503-210-5733? We have decades of experience helping companies find solutions, even if that ends up being a recommendation for something we don’t sell. We’re here for you, and we will do everything in our power to prevent a life full of pineapple pizza.