How to Take Data from your Touch Panel Display to your USB Drive Posted in: Product Tutorials – Tags: Touch Panel Display
Last Updated: May 31, 2024
In this tutorial video, we show how to take data from your touch panel display and put it on a USB drive. In this example we’re working with an AR700 Laser Displacement Sensor connected to an 8″ touch panel display via the A port.
Starting in the measurement screen, you can start doing measurements if you want to, but it’s not recording right off the bat. To start recording, go to app settings and then go into log measurements. It has to be checked okay, once that is checked you can go back to the measurement screen, start the measurements, and now it is logging measurements.
To transfer your data to your USB, hit stop, go back to app settings, go to utilities and then take a USB drive and insert it into any of the USB ports at the bottom. Make sure to always get it the wrong way the first time (yes, sarcasm).
Then hit copy data. It’ll say connect a USB thumb stick to the touch panel display then hit click okay. Now it’s waiting for the USB drive to mount and once it’s done mounting, it will transfer the log over to the USB drive.
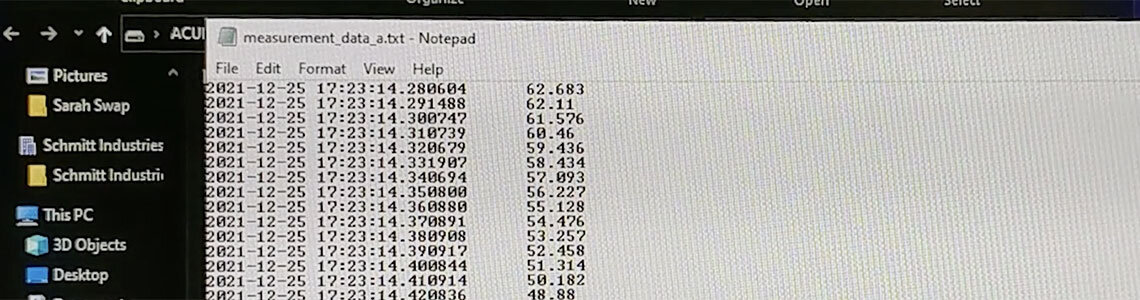
As soon as it says it’s safe to remove it, that means it’s done. You can remove the USB drive and connect it to your PC. In the root folder of the USB, you should see the measurement data and the output log. The output log is for troubleshooting and repair. The measurement data is what we’re looking for. It’ll be in a Text file. In our case, it’ll say measurement data A. The A in this case is for the port it was connected to. If we had connected to port B, it would say B here.
If you were getting a thickness measurement where you’re using ports A and B, and then combining it together, it would say measurement data A_B. If you had multiple measurements going on at the same time, you would have a file for each of them, for example, you’d have a measurement data A, measurement data B, maybe a measurement data C_D if you’re using C and D for a thickness measurement.
When we open it, it’s pretty straightforward. You can see that we have a timestamp and measurement. In our case, we started off with the sensor being out of range, so it’s returning a measurement of “none.” When we move to our data within range, we can see that it gives the measurement at every time stamp.
Please note that the measurements that we see are the exact same measurements that we saw on the screen. So if we calibrated, if we put an offset in, if we tared it, then that measurement is going to be what it outputs here. It’s not going to be the raw measurement, it’s going to be the calculated measurement.
If, for instance, you have more than one instance at the same time, you hit start more than once (you start-and-stop, start-and\-stop before you pull the data from it) each instance will start with a header line saying “Date-time” and “distance_a.”
Also, please note, every time you copy the data onto a USB, it removes the data from the touch panel display, so make sure that you’re backing these up. If I were to go and do it the measurement one more time, this file would be overwritten and it would be all new data.

Sarah has been our technical support and sales engineer for 5+ years. If you've ever reached out to Acuity Laser for tech support, more than likely, Sarah is the one who helped you.